이번 포스팅에는 peer-to-peer 에 대해 알아볼 것이다.
소켓만 알면 되지 굳이 peer까지 알아야 돼?
라고 생각할 수 있다.
하지만 peer는 웬만한 웹소켓을 사용하는 기술에서는 필수요소이다.
우선 webRTC부터 살펴보자.
MND에서는 webRTC를 다음과 같이 정의하고 있다.
WebRTC (Web Real-Time Communication)은 웹 애플리케이션과 사이트가 중간자 없이 브라우저 간에 오디오나 영상 미디어를 포착하고 마음대로 스트림할 뿐만 아니라, 임이의 데이터도 교환할 수 있도록하는 기술입니다. WebRTC를 구성하는 일련의 표준들은 플러그인이나 제 3자 소프트웨어 설치 없이 종단 간 데이터 공유와 화상 회의를 가능하게 합니다.
이를 위하여 WebRTC는 상호 연관된 API와 프로토콜로 구성되어 함께 작동합니다.
위의 글이 잘 이해가 안된다고 생각하면 그림으로 살펴보자

(알맞는 그림이 MDN에 없어 직접 그렸으므로 양해 부탁드림...)
일반적인 HTTP요청의 예시이다.
클라이언트(브라우저)에서 요청을 보내면 서버에서는 그에 대한 알맞은 (또는 미리 설정된)응답을 보내준다.
즉, 서버는 요청을 보낸 이에 대해서만 응답을 보내준다.
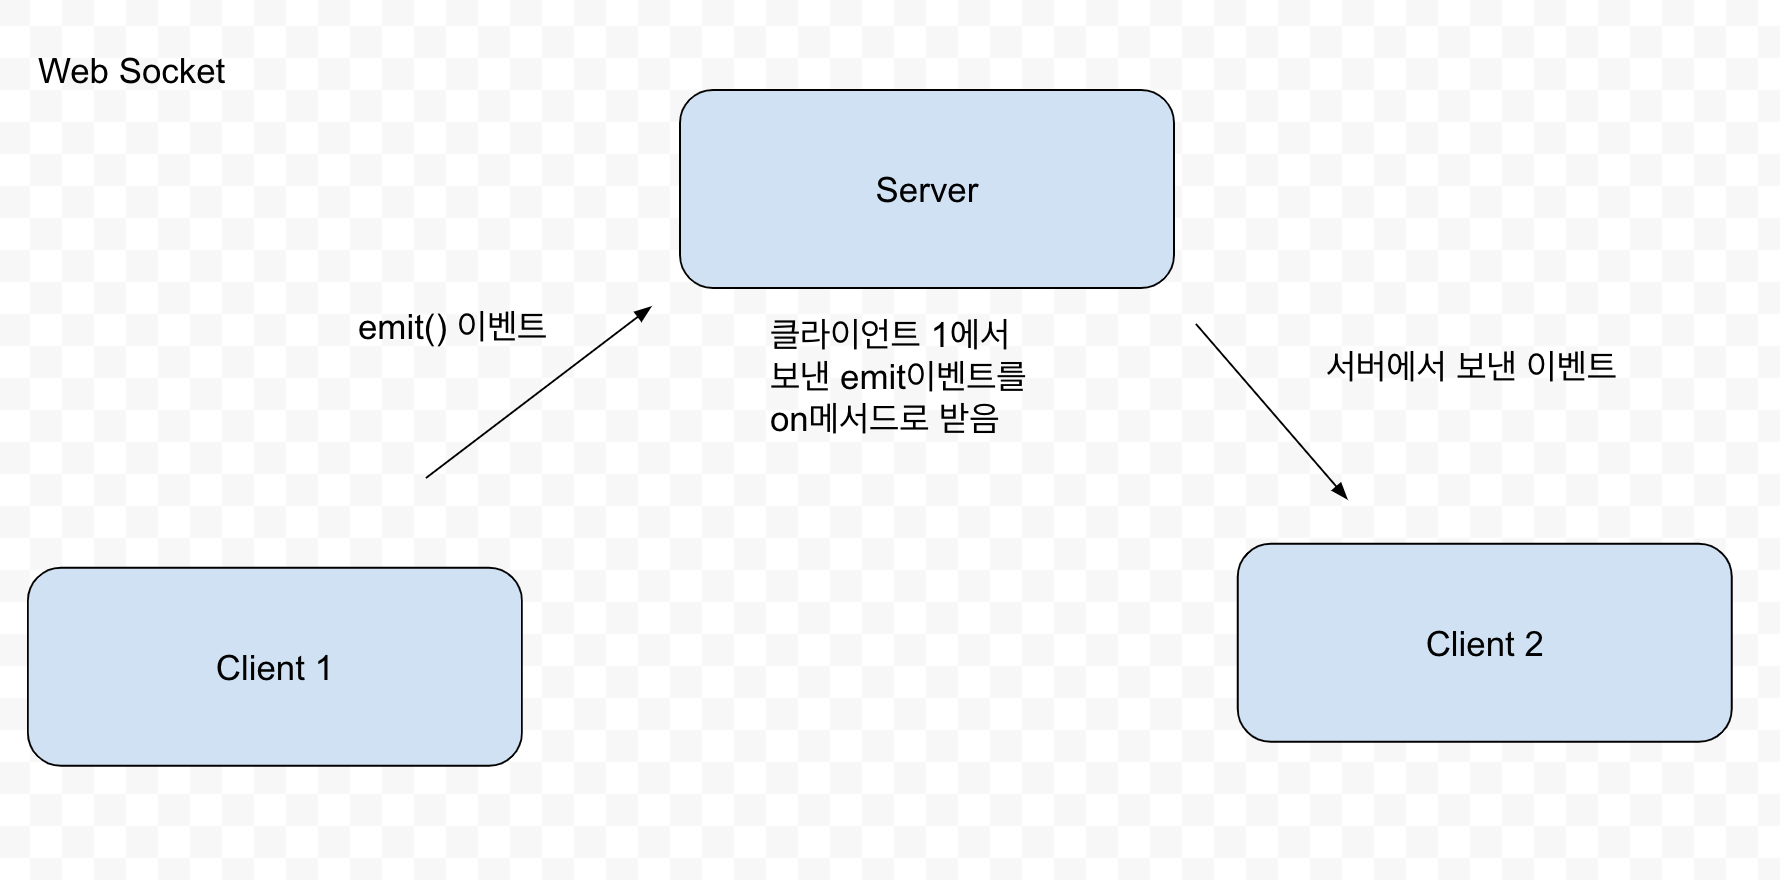
다음은 WebSocket의 그림이다.

클라이언트 1은 서버로 emit()요청을 보낸다.
서버는 미리 설정된 이벤트에 따라 다른 클라이언트(또는 전체, 혹은 방(room)에 있는 모든 등등)에게 이벤트를 발생시킨다.
즉 서버 입장의 코드는 다음과 같다.
  socket.on("client-1-event", () => {
    //do something..

    socket.emit("toss to the other client");
  });
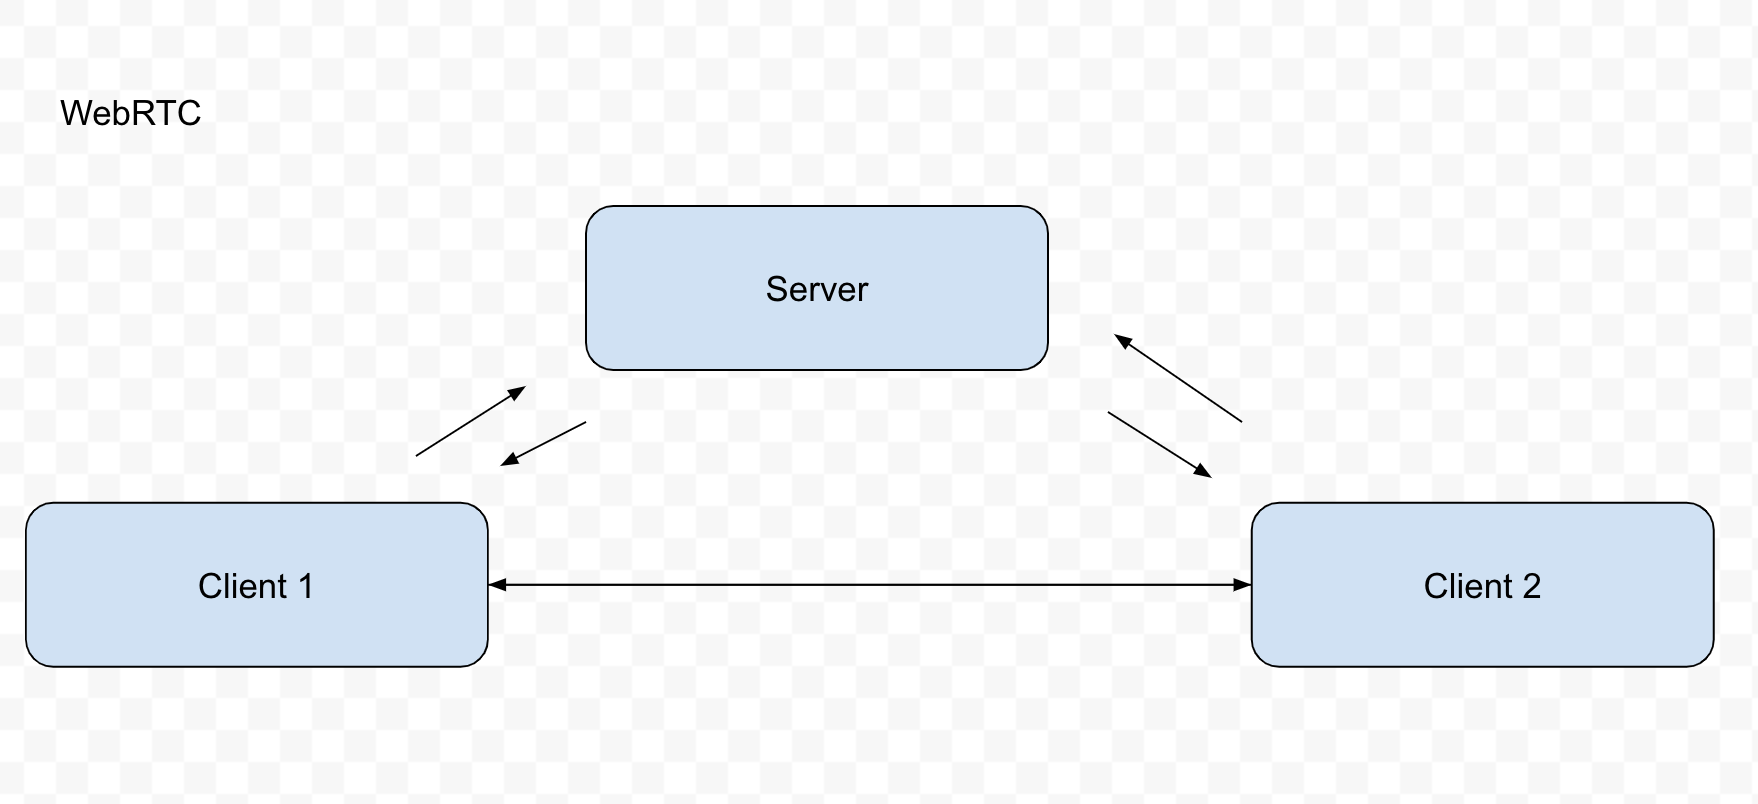
다음으로 WebRTC를 보자.

client1과 client2는 미리 설정된 WebRTC(Peer)로 영상 정보 또는 오디오 정보를 실시간으로 주고받을 수 있다.
즉 오디오나 영상등의 정보를 실시간으로 주고받고 싶다면 webRTC를 사용해라...
그 중 peerjs는 WebRTC P2P 데이터, 비디오 및 오디오 호출을 단순화하는 라이브러리이다. Peerjs는 브라우저의 WebRTC구현을 래핑하여 완전하게 구성이 가능하며 사용하기 쉬운 P2P 연결 API를 제공한다.
자세한 것은 Peerjs 공식문서를 확인하자
Room.js를 다음과 같이 수정하자.
// Room.js

import React, { useEffect, useRef } from "react";
import { io } from "socket.io-client";
import Peer from "peerjs";

const Room = () => {
  const socketRef = useRef(null);
  const peerRef = useRef(null);

  useEffect(() => {
    socketRef.current = io.connect("http://localhost:9000");

    socketRef.current.emit("join-room");

    peerRef.current = new Peer();
    console.log(peerRef.current.id);
  }, []);

  return <div></div>;
};

export default Room;
peerjs의 사용은 매우 간단하다.
Data connections
Connect
var conn = peer.connect('another-peers-id');
// on open will be launch when you successfully connect to PeerServer
conn.on('open', function(){
  // here you have conn.id
  conn.send('hi!');
});
Receive
peer.on('connection', function(conn) {
  conn.on('data', function(data){
    // Will print 'hi!'
    console.log(data);
  });
});
Media Calls
Call
var getUserMedia = navigator.getUserMedia || navigator.webkitGetUserMedia || navigator.mozGetUserMedia;
getUserMedia({video: true, audio: true}, function(stream) {
  var call = peer.call('another-peers-id', stream);
  call.on('stream', function(remoteStream) {
    // Show stream in some video/canvas element.
  });
}, function(err) {
  console.log('Failed to get local stream' ,err);
});
Answer
var getUserMedia = navigator.getUserMedia || navigator.webkitGetUserMedia || navigator.mozGetUserMedia;
peer.on('call', function(call) {
  getUserMedia({video: true, audio: true}, function(stream) {
    call.answer(stream); // Answer the call with an A/V stream.
    call.on('stream', function(remoteStream) {
      // Show stream in some video/canvas element.
    });
  }, function(err) {
    console.log('Failed to get local stream' ,err);
  });
});
더 자세한 사항은 peerjs 공식문서를 확인토록하고 이제 peerjs를 연결해보자.
// Room.js

import React, { useEffect, useRef } from "react";
import { io } from "socket.io-client";
import Peer from "peerjs";

const Room = () => {
  const socketRef = useRef(null);
  const peerRef = useRef(null);

  useEffect(() => {
    socketRef.current = io.connect("http://localhost:9000");

    socketRef.current.emit("join-room");

    peerRef.current = new Peer();

      peerRef.current.on("open", (id) => {
        //data connection
      console.log(id);
    });
  }, []);

  return <div></div>;
};

export default Room;
끝이다.
connection부분은 이것으로 끝이고 media call이나 receive또한 공식문서에 있는 그대로 사용하면 문제없이 구현할 수 있다.
이제 다음 포스팅부터 본격적으로 화상통화 기능을 구현해보도록 하자